In summary:
- To get the best shots, treat the Ice Palace as an architectural subject, not just a tourist spot.
- Mastering light means shooting during the blue hour for balance and deep night for drama, paying close attention to your camera’s white balance.
- Avoiding crowds is a science: the “11 PM rule” is your key to pristine, empty shots after the main crowds have left.
- Surviving the cold requires a thermal management system for your gear; use body heat, hand warmers, and external batteries.
- The best compositions are found by looking closer at ice details and understanding the history of the structure’s construction.
Every winter, photographers flock to the Québec Winter Carnival with a shared goal: to capture the ephemeral magic of Bonhomme’s Ice Palace. The challenge, however, is equally universal. Your perfect composition is often flooded with people, your camera battery dies in the biting cold, and the vibrant LED lights turn into a blown-out mess on your screen. The common advice—”go at night” or “bring extra batteries”—barely scratches the surface of the problem. These tips often lead to frustration, resulting in photos that feel more like crowded snapshots than the ethereal portraits the palace deserves.
But what if the key wasn’t just enduring the cold or waiting for a lucky break in the crowd? What if capturing the definitive image of the Ice Palace was a matter of strategy, technique, and a deeper understanding of the environment? This guide moves beyond the basics. We will approach the palace not as a passive backdrop, but as a dynamic subject of ephemeral architecture. We will explore the physics of cold, the geometry of light, and the psychology of crowd flow to give you a true artistic and technical advantage.
This isn’t about having the most expensive camera; it’s about having the right plan. We’ll deconstruct the process, from choosing the precise moment between sunset and deep night to implementing a thermal management system that keeps your gear alive. By the end, you’ll have a clear strategy to create images that capture the soul of the palace: its light, its texture, and most importantly, a sense of quiet solitude amidst the festive chaos.
This guide provides a structured approach for the dedicated photographer. Below, we’ll explore the specific tactics and timing needed to master this unique photographic challenge, from the nuances of LED lighting to the secrets of capturing Bonhomme himself without the hour-long queue.
Summary: A Photographer’s Strategic Guide to the Ice Palace
- Blue hour vs. Night: When does the LED lighting look best on camera?
- The 11 PM rule: Why late night visits yield the cleanest shots
- Battery drain: How to keep your phone alive in -20°C while shooting
- Inside the walls: Capturing the ice sculptures and graffiti details
- How do they build it? The engineering behind the stacked ice blocks
- Catching Bonhomme: The schedule secrets to get a photo without a 1-hour wait
- Golden hour angles: Which deck faces the sun correctly in the evening?
- Sleeping in the Hôtel de Glace: How to Stay Warm All Night in -5°C Suites
Blue hour vs. Night: When does the LED lighting look best on camera?
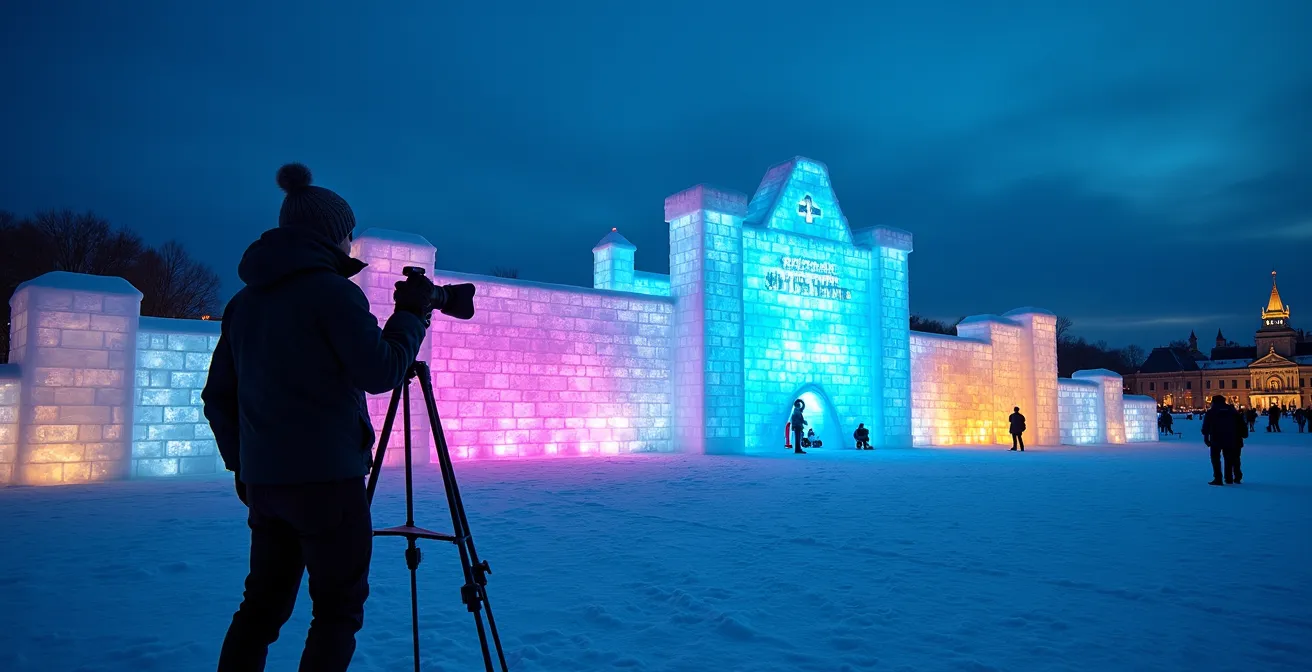
The biggest mistake photographers make at the Ice Palace is treating all night-time the same. The quality of light changes dramatically, and your best shots are made in two specific, fleeting windows: the blue hour and deep night. Understanding the difference is the first step in mastering the light geometry of the palace. The blue hour, that magical 15-20 minute period just after sunset, offers a soft, cool ambient light in the sky that perfectly balances the warm, vibrant tones of the palace’s LED system. This is your moment for balanced, ethereal shots where the sky still has detail and colour.
During this window, your camera’s white balance is critical. Set your Kelvin temperature to the 4500-5200K range. This will neutralize the intense blue of the sky while keeping the LED colours rich and true-to-life. Use a moderate ISO (400-800) to capture enough ambient light without introducing too much noise. During the musical evenings, which were held on multiple nights during the February 2-11, 2024 carnival, the palace lights are synchronized with performances. This creates dynamic sequences that are perfect for long exposures, allowing you to paint with trails of light against the deep blue sky.
Once the sky turns completely black, about 90 minutes after sunset, your strategy must shift. This is deep night. The high contrast between the dark sky and the bright palace demands more technical control. Switch your white balance to a slightly warmer 5000-5500K or use a grey card for a custom setting to ensure the ice renders as a neutral canvas for the lights. Your ISO will need to climb to the 1600-3200 range to maintain a reasonable shutter speed, especially if you’re shooting handheld. Arriving at least 30 minutes before twilight ends is crucial; it gives you time to scout compositions and set up your gear before these brief, optimal light windows begin.
The 11 PM rule: Why late night visits yield the cleanest shots
The second pillar of a successful shoot is mastering crowd dynamics. The Québec Winter Carnival is a massive event; historic attendance figures show the event has drawn up to one million people in the past, with the vast majority of visitors concentrated between 7 PM and 10:30 PM. For a photographer, this peak time is a creative dead zone. Your frame is constantly filled with people, the snow is trampled and muddy, and a sense of calm is impossible. The solution is the “11 PM rule”: plan your main architectural shoot to begin after 11 PM, especially on weeknights.
By this time, the family crowds and casual tourists have thinned out, leaving the palace grounds nearly deserted. The snow, often freshly groomed by staff or simply left to rest, returns to a more pristine state. This allows for clean, wide-angle compositions where the palace stands in majestic solitude. You can finally capture the structure as the architect intended: a monument of ice and light, uncluttered by human traffic. This is when you can experiment with low angles, centered symmetrical shots, and reflections on undisturbed icy surfaces without someone walking through your frame.
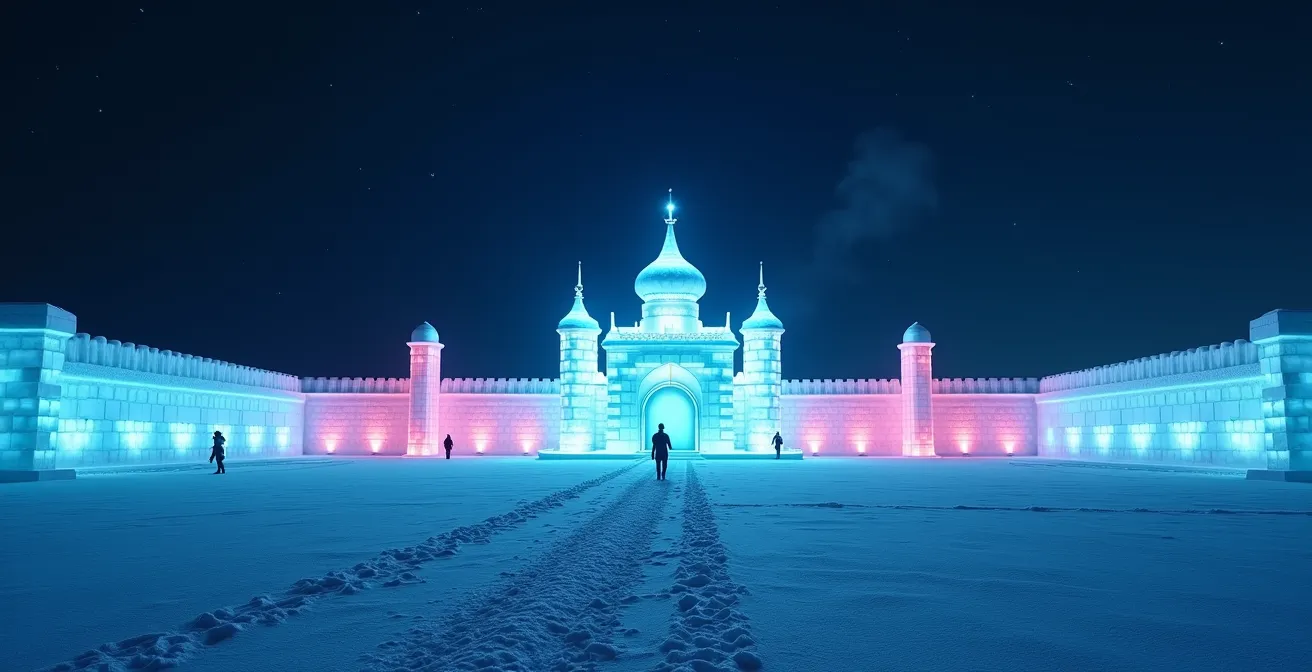
The image above illustrates the reward for your patience. The untrampled snow in the foreground becomes a compositional element, a vast negative space that emphasizes the palace’s grandeur. The LED lights wash over the ice and reflect onto the clean snow, creating a cohesive, immersive scene. You might only see a lone security guard in the distance, providing a subtle sense of scale. The cold, crisp air even allows for a clear view of the stars, adding another layer to your composition. This clean-slate environment is simply not available during peak hours.
Battery drain: How to keep your phone alive in -20°C while shooting
Your artistic vision and perfect timing are useless if your gear is dead. Extreme cold is the enemy of lithium-ion batteries; at -20°C, a fully charged phone or camera battery can lose over half its capacity in minutes. Fighting this requires a proactive thermal management system, not just a spare battery. The core principle is simple: a warm battery is a happy battery. Your body is the primary heat source. Keep your phone and spare camera batteries in an inner chest pocket, close to your skin, between shots. Only expose them to the frigid air for the 5-7 minutes you’re actively shooting.
To further protect your gear, you can purchase chemical hand warmers from any local pharmacy like Jean Coutu or Pharmaprix and attach one to the back of your phone case with a simple rubber band. For more intensive shoots, an external battery pack is a must. Don’t just hold it in your hand; keep the power bank inside an insulated pouch or even a thick wool sock in your pocket while it’s connected to your phone. This keeps the power source warm and charging effectively. This “shoot-and-warm” rotation is a professional discipline that ensures your gear lasts the entire night.
This table illustrates just how quickly performance degrades as the temperature drops, reinforcing the need for a constant warming strategy.
| Temperature | Battery Life | Recommended Action |
|---|---|---|
| 0°C to -5°C | 75-90% capacity | Normal usage, keep in pocket between shots |
| -5°C to -15°C | 50-75% capacity | Limit exposure, use hand warmers |
| -15°C to -25°C | 25-50% capacity | Essential shots only, constant warming required |
Your Action Plan: Battery Thermal Management
- Keep phone in inner chest pocket against body heat between shots – maximum 5-7 minutes exposure to cold.
- Attach chemical hand warmers (available at Jean Coutu or Pharmaprix) to the back of your phone case with a rubber band.
- Use an external battery pack kept inside an insulated pouch or thick wool sock while it’s connected to your phone.
- Implement a shoot-and-warm rotation: 5 minutes of shooting, followed by 10 minutes of warming in your pocket.
- Keep spare camera batteries in interior pockets at body temperature, and swap when the main battery hits the 30% mark.
Inside the walls: Capturing the ice sculptures and graffiti details
While the grand, wide shots of the palace are essential, the real story is often found in the details. The interior of the palace is a gallery of ephemeral architecture, featuring intricate ice sculptures that change each year based on the carnival’s theme. For a photographer, these are opportunities to capture the incredible artistry and texture of the ice itself. Instead of just taking a snapshot of a sculpture, get closer. Look for the “micro-landscapes” within the ice: the patterns of trapped air bubbles, the crystalline structures of frost, and the tool marks left by the artists.
Each year’s theme provides a rich narrative context. For example, a recent theme centered on “Local Legends,” bringing Québec folk tales like La Chasse-Galerie and Rose Latulippe to life in frozen form. Photographing these sculptures becomes an act of cultural storytelling. Use a macro lens or the macro mode on your phone to fill the frame with these details. Focus on how the coloured LED light refracts through the ice, creating prismatic effects and highlighting textures. Play with shallow depth of field to isolate a specific detail, letting the rest of the sculpture blur into a beautiful, abstract background of colour and light.
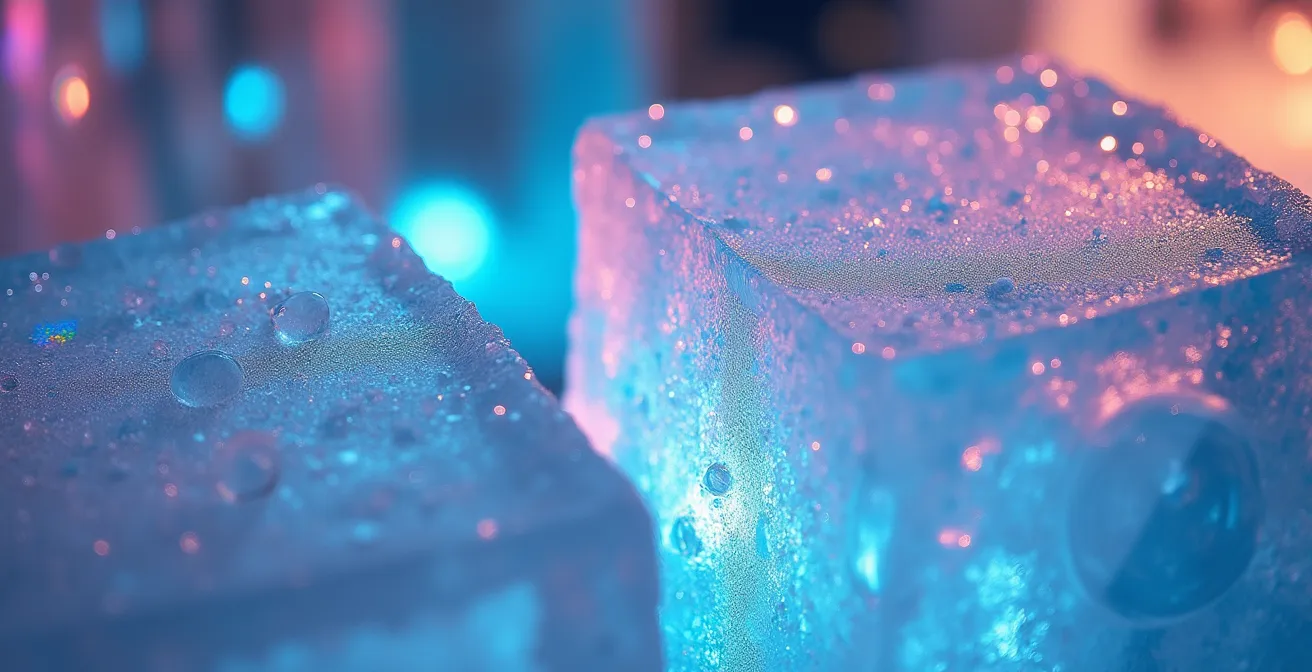
This close-up approach transforms a simple sculpture into an abstract work of art. Notice how the joint where two ice blocks meet reveals the slushy “mortar” used in construction, contrasting with the crystal-clear ice. These are the details that tell the engineering and artistic story of the palace. By focusing on these small-scale wonders, you create a portfolio that goes beyond the obvious, showing a deeper appreciation for the craft and the unique properties of ice as a medium.
How do they build it? The engineering behind the stacked ice blocks
To truly photograph a structure, it helps to understand how it’s built. The modern Ice Palace is an engineering marvel, and its construction methods directly impact its photographic qualities. While the carnival has been a massive event for decades, the palace wasn’t always the crystal-clear spectacle it is today. In fact, official sources from the carnival confirm that until 1992, the palace was made of packed snow due to a lack of regional ice suppliers.
The shift to manufactured ice blocks, sourced from specialized companies like Produits de Glace Bédard, was a game-changer for photographers. Unlike natural river ice, which is often cloudy with impurities and sediment, manufactured ice is perfectly clear. This high-purity ice acts like a fibre-optic cable, transmitting the LED light from within the walls with far greater intensity and clarity. This is why the palace glows with such a vibrant, gem-like quality. The superior light refraction creates more dramatic colours, sharper details, and a magical internal luminosity that was impossible with snow or cloudy natural ice.
Understanding this technical evolution gives you a greater appreciation for your subject. When you compose your shot, you’re not just capturing ice; you’re capturing the result of a deliberate engineering choice designed for visual impact. You can emphasize this quality by focusing on angles that highlight the light passing through the thick blocks, showing off their transparency. This knowledge elevates your work from a simple vacation photo to a more informed architectural study of a unique, temporary structure built for the world’s largest winter carnival.
Catching Bonhomme: The schedule secrets to get a photo without a 1-hour wait
For many, the ultimate souvenir is a photo with Bonhomme himself. However, this often involves waiting in a long, cold line, which is a frustrating experience for any photographer. Getting the shot without the wait requires a strategic approach, treating the task like a wildlife photographer tracking a rare subject. As the travel experts at Happy to Wander note, the queues can be daunting. In their guide to the carnival, they state:
Getting a photo with him is the ultimate Quebec Winter Carnival souvenir. If you want a Bonhomme photo but don’t want to wait in line for the real deal, there are some Bonhomme statue photo ops scattered around the city, including one in front of the Chateau Frontenac and inside the lobby of the hotel itself.
– Happy to Wander Travel Blog, Quebec Winter Carnival Activities Guide 2025
This highlights the first secret: the static photo-op. The Bonhomme statues offer a queue-free alternative for a classic shot. But to capture the real, living character, you need to be smarter. The key is to find him away from his official meet-and-greet throne at the Ice Palace. Enable push notifications on the official Carnaval de Québec app, which often announces his impromptu appearances in real-time. Another pro tip is to identify his backstage rest area. Positioning yourself near the entrance/exit allows for candid, more natural shots as he comes and goes, without the formal queue.
Furthermore, Bonhomme makes appearances at other carnival events. Tracking him at venues like the Ice Cross Canoe race or neighbourhood parties provides a unique background that tells a bigger story than the standard palace shot. Finally, timing your visit to the palace is crucial. Character meet-and-greets have the lowest attendance during off-peak times. A Tuesday at 4 PM, for example, will have a fraction of the crowd of a Saturday night, dramatically cutting your wait time. By combining these tactics, you can get your coveted photo efficiently and creatively.
Golden hour angles: Which deck faces the sun correctly in the evening?
While the LED light show is the main attraction, don’t neglect the two other daily light shows provided by nature: the golden hours. These periods—just after sunrise and just before sunset—offer a completely different aesthetic that is often overlooked and therefore, far less crowded. In winter, these windows are particularly fleeting; winter golden hours in Quebec typically last only 15-25 minutes due to the low angle of the sun, making timing essential. The evening golden hour bathes the Ice Palace in a warm, soft, amber glow that contrasts beautifully with the cold, blue tones of the snow and ice.
To capture this, you need the right vantage point. The Ice Palace is situated on the Plains of Abraham, which offers elevated positions to the south and west. For the evening golden hour, you need to be positioned east of the palace, looking west towards the setting sun. The optimal location is the elevated deck on the eastern edge of the Plains, near the Citadelle of Québec. From this angle, the setting sun will directly illuminate the front-facing walls of the palace.
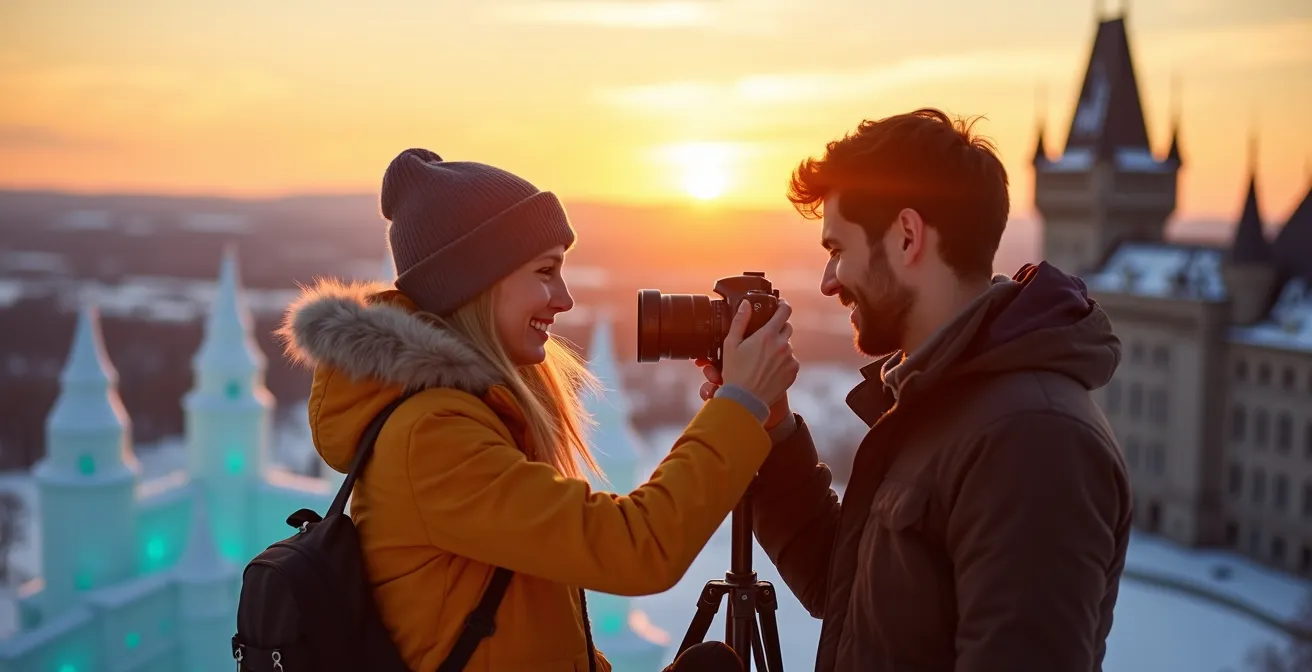
This vantage point allows you to frame the palace with the magnificent Québec City skyline, including the iconic Château Frontenac, in the background. As the sun dips lower, you can capture the magical transition moment when the last rays of direct sunlight kiss the highest towers of the palace while the base begins to glow with its own internal LED illumination. This creates a complex and beautiful layering of warm natural light and cool artificial light—a sophisticated shot that most visitors will completely miss.
Key takeaways
- The perfect Ice Palace photo is a result of strategic timing (blue hour and late night) and technical control (white balance and ISO).
- Crowd avoidance is a skill; use the “11 PM rule” to get clean, architectural shots on pristine snow.
- Active thermal management for your phone and camera batteries is non-negotiable in Quebec’s winter temperatures.
Sleeping in the Hôtel de Glace: How to Stay Warm All Night in -5°C Suites
In the quest for the ultimate winter photography experience in Québec, many visitors confuse Bonhomme’s Ice Palace with another famous frozen structure: the Hôtel de Glace (Ice Hotel). It’s crucial to understand they are two entirely different things. The Ice Palace is a temporary public attraction for the carnival, located on the Plains of Abraham. The Hôtel de Glace is a fully functional, overnight accommodation located at the Valcartier Vacation Village, about a 40-minute drive from the city. The interior of the hotel is kept at a constant -5°C.
This distinction is critical for planning your visit. While the Ice Palace is an open-air structure subject to outdoor temperatures, the Ice Hotel is an enclosed environment with its own set of rules and challenges, especially if you dare to spend the night. The following table clarifies the key differences:
| Feature | Bonhomme’s Ice Palace | Hôtel de Glace |
|---|---|---|
| Location | Plains of Abraham, Quebec City | Valcartier, 40 minutes from city |
| Purpose | Carnival attraction | Overnight accommodation |
| Temperature | Outdoor winter temps | Constant -5°C interior |
| Season | February carnival only | January to mid-March |
For those adventurous photographers wanting to take on the challenge of sleeping in the Hôtel de Glace, staying warm is a matter of following a strict protocol. Any moisture on your body or in your sleeping bag will freeze and make you dangerously cold. The hotel provides an “arctic sleeping protocol” for this very reason. It begins by raising your core body temperature in the outdoor hot tubs and sauna, then drying off completely before changing into a single, dry merino wool base layer (cotton is forbidden as it holds moisture). You must then immediately get into your arctic-grade sleeping bag and cinch the hood, leaving only your nose and mouth exposed. Crucially, you must never breathe inside the bag, as the moisture from your breath will freeze and destroy its insulating properties.
Now that you are equipped with the strategies of a professional night photographer, the next logical step is to build your own shooting plan. Choose your ideal time, prepare your thermal management kit, and head out to capture the Ice Palace in a way few others will.